Installation
Theme
In order to begin installing Kensington theme, you need a working copy of WordPress installed on your own server.
In the theme package you will get a kensington.zip file. You can upload this file directly from your WordPress admin panel, or manually via FTP.
-
Upload via WordPress admin panel:
- Login to your WordPress admin and go to Appearance » Themes
- Click the “Add New” button
- Click the “Upload Link”, select the kensington.zip file and click “Install Now”
- Activate the theme.
-
Upload via FTP:
- Login to your site via FTP
- Browse to themes directory (wp-content/themes)
- Unzip the kensington.zip file and upload kensington folder to your themes directory
- Login to your WordPress site and go to Appearance » Themes, and activate the theme
Plugins
After you activated the theme, you will see a notification offering you to install the required plugins. Click “Begin installing plugins”, and you will see 2 required plugins: Kensington Functionality and Tonjoo Page Builder.
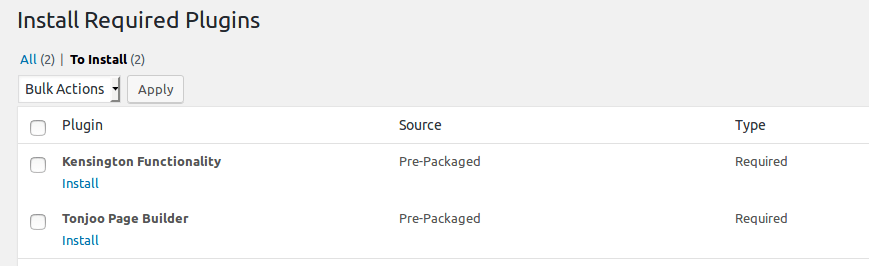
Click on all checkboxes, select Install on Bulk Actions dropdown, and click Apply. The plugins will be installed & activated automatically.
Update WordPress 5.0
WordPress 5.0 force us to use Gutenberg editor and unfortunately our Tonjoo Page Builder has not supported it yet. So we need to install classic editor to make our Tonjoo Page Editor run smoothly.
Since Kensington 1.1.4, we have add required plugin to make Tonjoo Page builder can run on WordPress 5.0. You will need to install classic editor which is required plugin.
If you still using Kensington below 1.1.4 version and you use WordPress 5.0, please update Kensington theme to the latest version. At the latest version you will see notice like this (install required plugins).
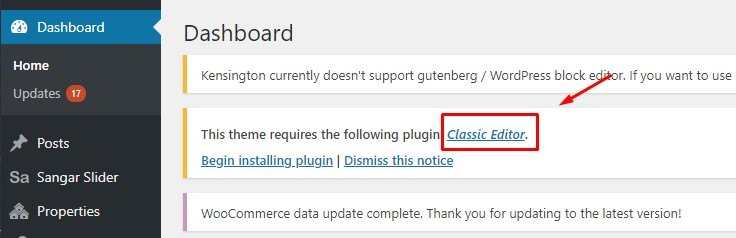 Just click that classic editor link and it will bring you to install Classic editor plugin. After installing then Activate it. Now you are ready to go to use Tonjoo Page Builder along with WordPress 5.0.
First Setup
Choosing Platform
After installing required plugin, the most important thing you have to do is deciding if you want to build booking website or property website. It is because Kensington theme comes in two platforms. It is booking platform and property platform. Booking platform allows your website to accept online booking. Property platform allows your website to sell property.
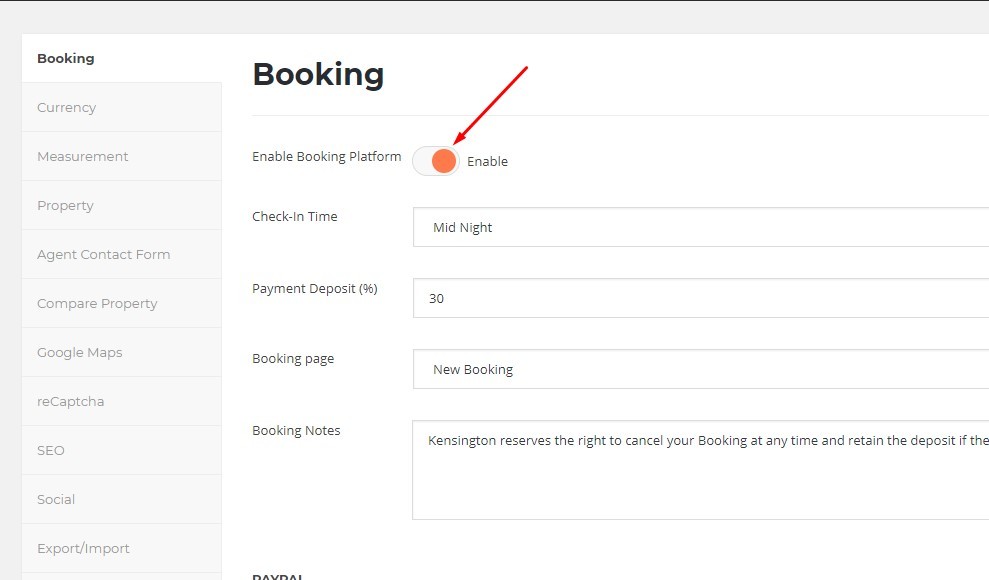
To choose what platform you want, go to Kensington options » booking and then click enable.
The main difference between booking and property platform is in the property data options. See picture below to see the difference
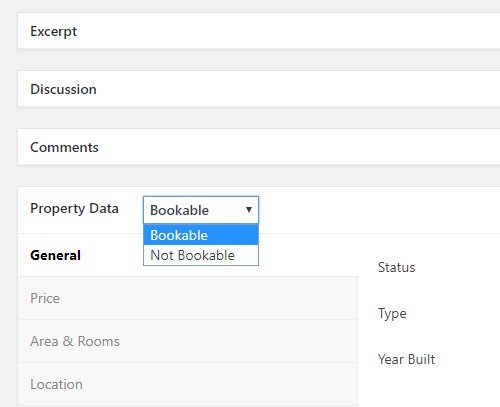
property data in booking platform
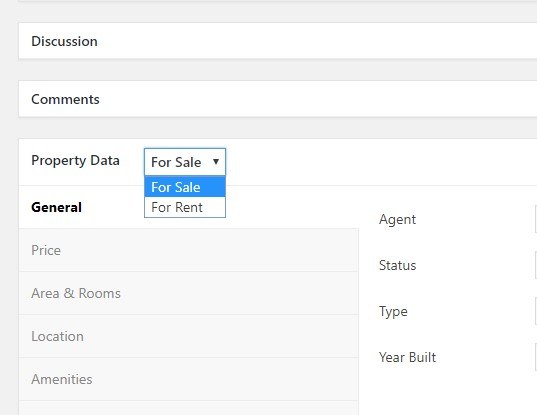
Property data in property platform
If you enable booking platform, this will turn your property into “bookable” or “not bookable”, but if you disable booking platform, this will turn your property into “for sale” or “for rent”.
In other words if you want to build online booking website, enable booking platform, but if you want to sell or rent your property, disable booking platform.
Set Google API
In order to get fully functional of theme features, you need to fill the Google Maps API. Google maps API is needed to display the proper address location on Google map.
To get Google Maps API key follow these steps:
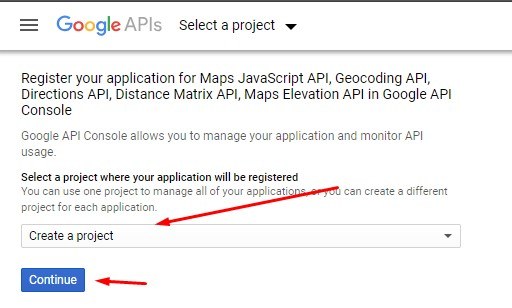
1. Go to Google API console
2. Create a new project or select an existing project then click on Continue.
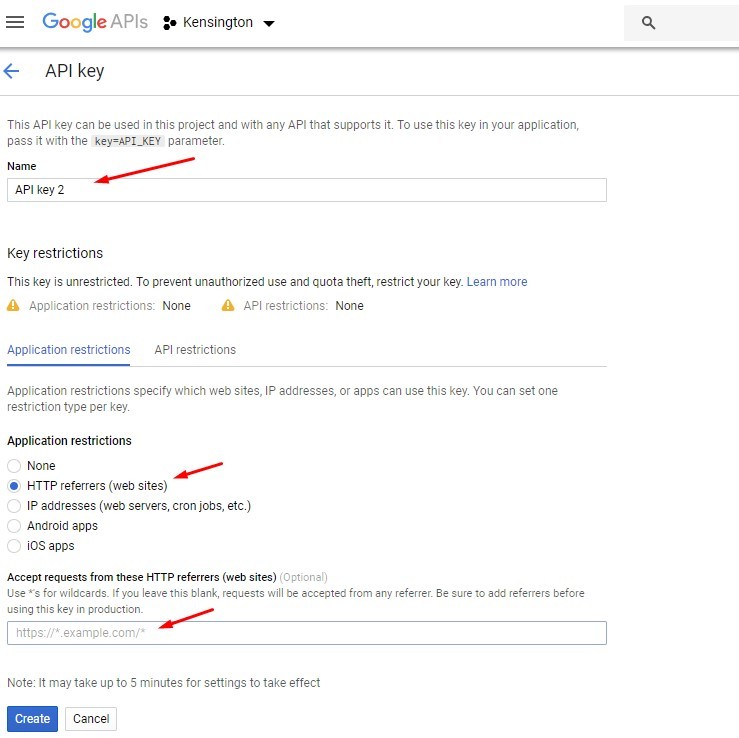
3. Name your API key and restrict it by adding your site URLs as shown in the screenshot below.
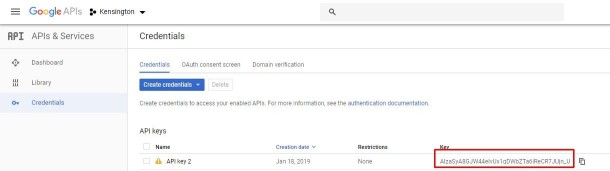
4. Copy and paste to Google maps API key text to form in the Kensington Options. See Google Map section for more detail.
Sample Data
After you activate your theme and install required plugins you may want to install sample data like in the theme demo.
This theme comes with 2 sample data in the dummy folder:
- booking-demo-data.xml
- property-demo-data.xml
You only need to upload one of them based on the platform you want to build (booking or property platfom). If you want to build online booking website, import booking-demo-data.xml, but if you want to build sell/rent property website, import property-demo-data.xml.
To install the sample data, Go to Tools » Import » WordPress and install import plug in for WordPress. Click Run Importer and browse the file, select the xml file and click “Upload file and import” button. Click Submit button to begin importing the content.
To set the homepage, you need to import from the homepage preset. Go to Homepage section for more detail.
Pages
Page Templates
This theme comes with page templates that you can choose from the page editor » Page Attributes » Template.
- Default Template
Use this template for standard page. - Contact
Use this template to show contact info: Address, Phone, Email, Map, and contact form. - Countdown
Use this template to show countdown timer. - Home
Use this template to create homepage with page builder. Go to Homepage section to see how to set homepage. - Search
Use this template to create search result page with map in the header. Go to this Property Search Results section to see how to set search result page. - Search 2
Use this template to create search result page with map in the sidebar. Go to this Property Search Results section to see how to set search result page.
Page Builder
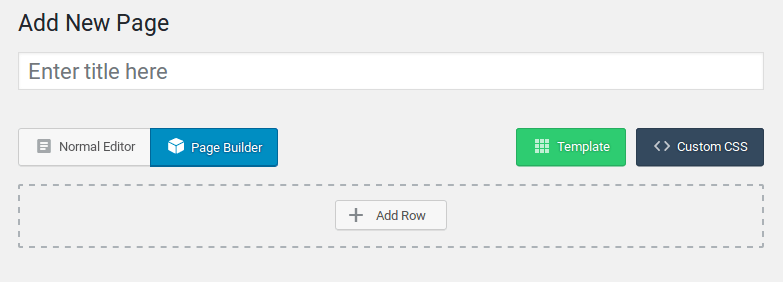
To use the page builder, create a new page and click the Page builder tab. You will see a new interface to add Row, Template & Custom CSS.
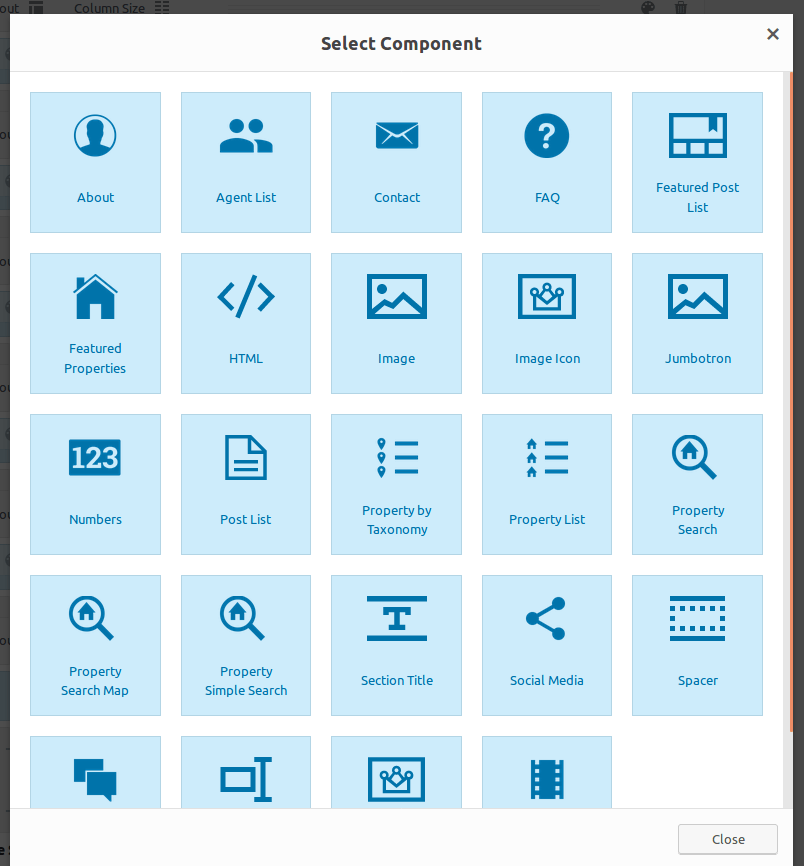
Click Add Row to insert a new row. Inside the row, you can add a Component. Click the Add Component to open the Select Component modal box. You can choose from these components:
Homepage
To create the homepage like in the theme demo, please make sure the plugin Tonjoo Page Builder is installed and activated, and follow these steps:
- Go to Pages » Add New
- Enter your page title
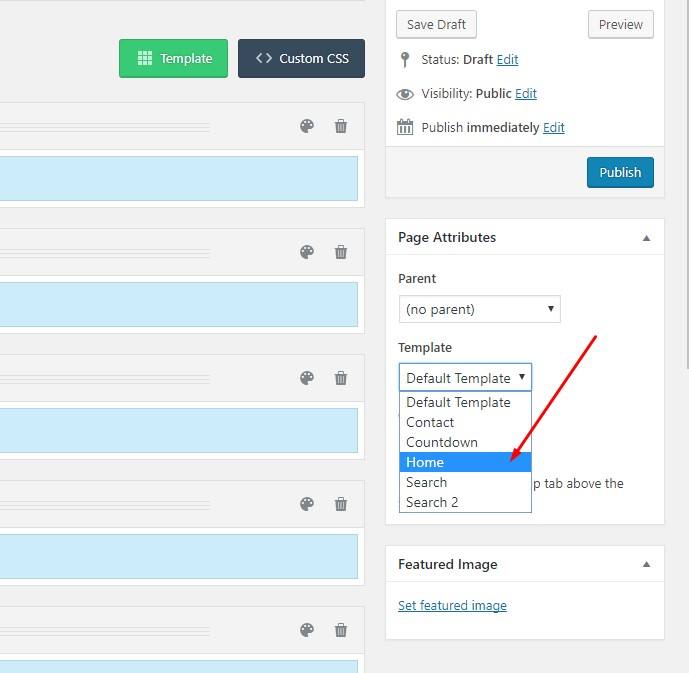
- Select ‘Home’ in Page Attributes » Template dropdown
- Select Page Builder below the page title
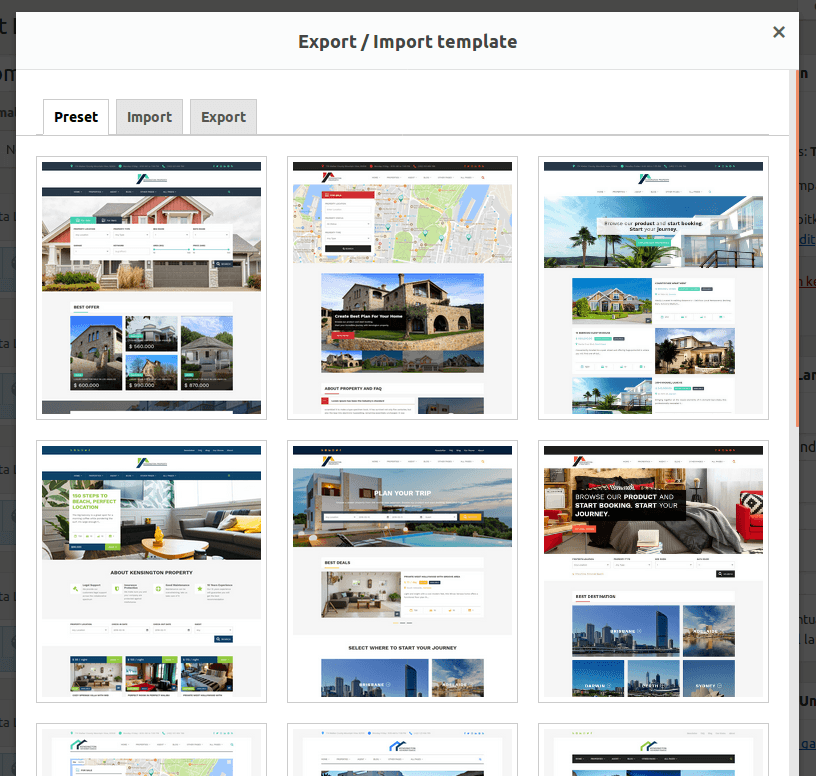
- Click the Template button and select one of the homepage presets
- You can customize page builder components by clicking ‘Edit Component’ button at the top left of each component
- Click Publish
Set Page as Homepage
In the right side of your screen there is metaboxes.
Go to page attributes template and then click dropdown button. It will show you the available template page that theme provides. Choose Home options.
After choosing page template, set this page as homepage. To do this go to Appearance » Customize
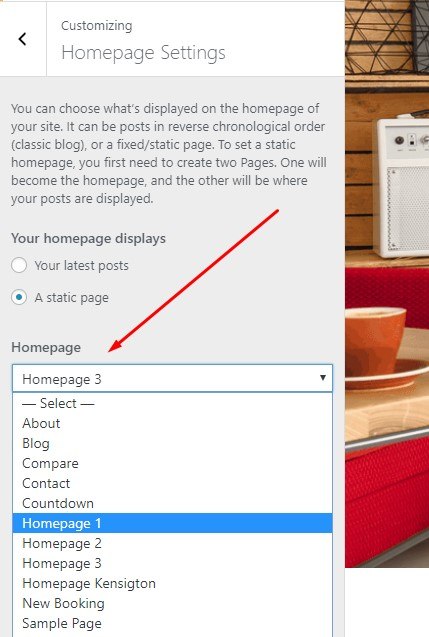
Click homepage settings » A static page » at the homepage select, choose your page that you want to set as homepage.
Click publish.
Page Header
Page header is an area for the page title and breadcrumb navigation at the top of the page. You can customize the background of this area from Customizer » Appearance » Page Header Style.

Options
Booking
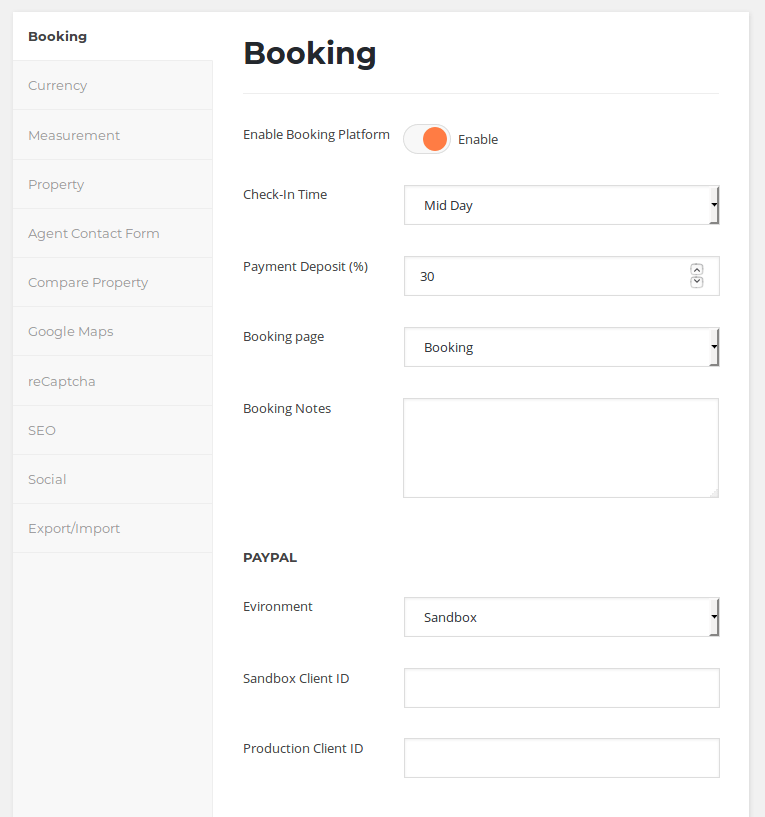
The booking platform can be enabled from here. If you enabled booking platform, you can access more options below
- Check-In Time
- Mid Day: check-in time will start at 12:00:00 and end at 11:59:59. If the user choose 2 blocks of dates in the calendar, booking will be counted as 2 days.
- Mid Night: check-in time will start at 00:00:00 and end at 23:59:59. If the user choose 2 blocks of dates in the calendar, booking will be counted as 1 night.
- Payment Deposit
The payment required will be counted from {total payment} x {deposit} %. - Booking page
Choose a page that will be used as the booking page. If you don’t have the page, you need to add an empty page from Pages » Add New, add a title and click Publish. - Booking notes
Notes will be displayed in booking page. - Paypal Environment
- Sandbox: this is a virtual testing environment.
- Production: this is a live environment.
- Sandbox Client ID
You can get Sandbox Client ID from https://paypal.com - Production Client ID
You can get Production Client ID from https://paypal.com
Currency
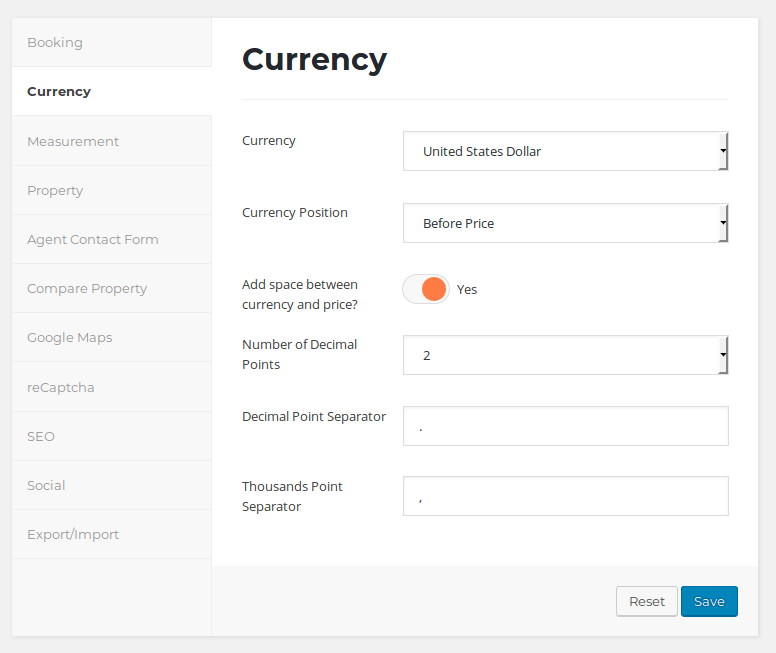
This section is for price formatting. You can choose the currency, currency position (before or after the price), enable space between currency and price, number of decimal points, decimal point separator, and thousands point separator.
Measurement
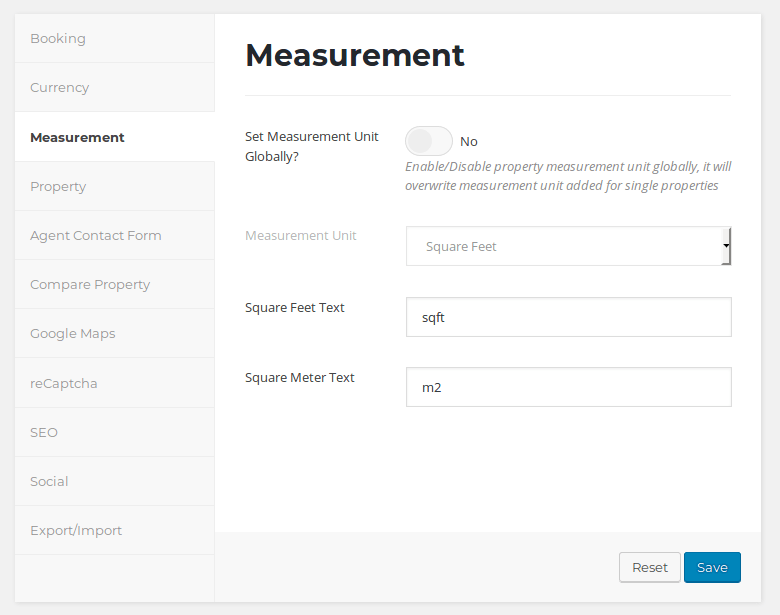
This section is for measurement settings. If you enabled the measurement unit globally, it will be used in all property prices.
Property
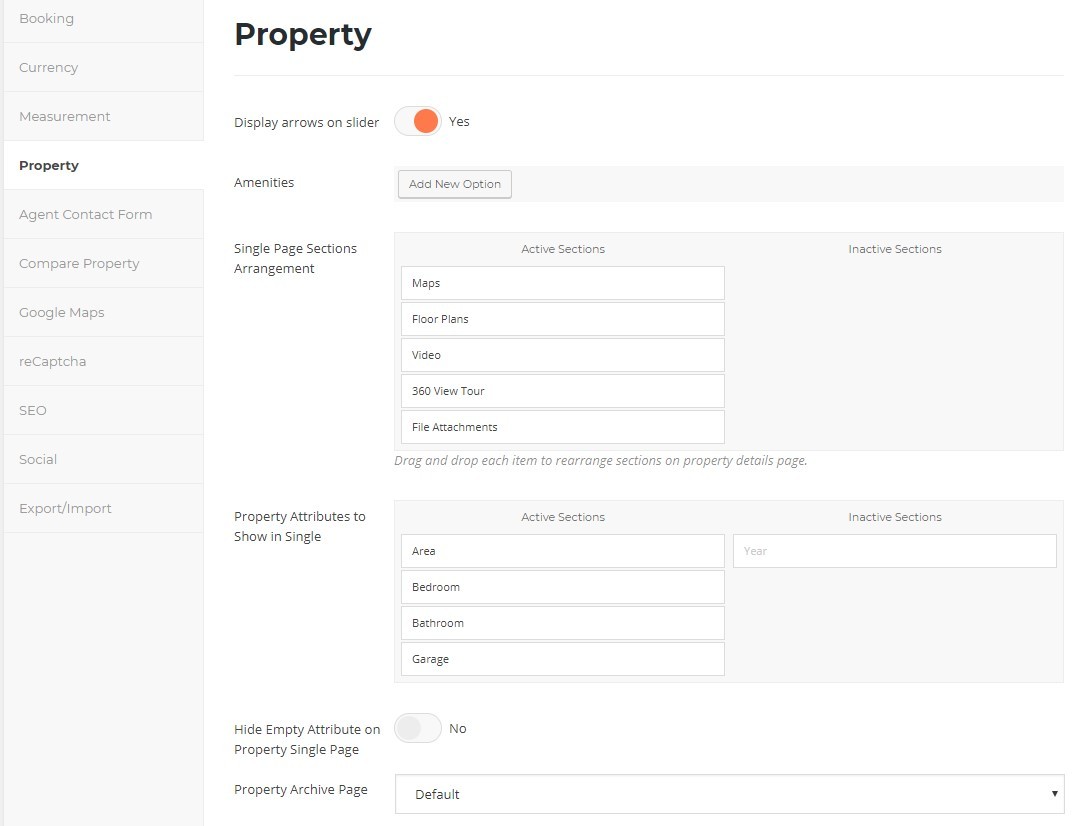
This section is for property single & archive page.
-
Display arrows on slider
You can choose whether to show or hide the arrow on slider.
-
Amenities
You can manage which amenities to use in properties. The data here will be used when you add/edit a property.
-
Show Room Details on Archive
If enabled, room details (area, bedroom, bathroom, garage) will be shown in property archive page.
-
Single Page Sections Arrangement
You can choose which sections will be shown here. Drag a section from Inactive Sections to Active Sections to activate it.
-
Property Attributes to Show in Single
You can choose what attributes you want to show at single page. Just drop attribute to inactive area to remove certain attribute.
-
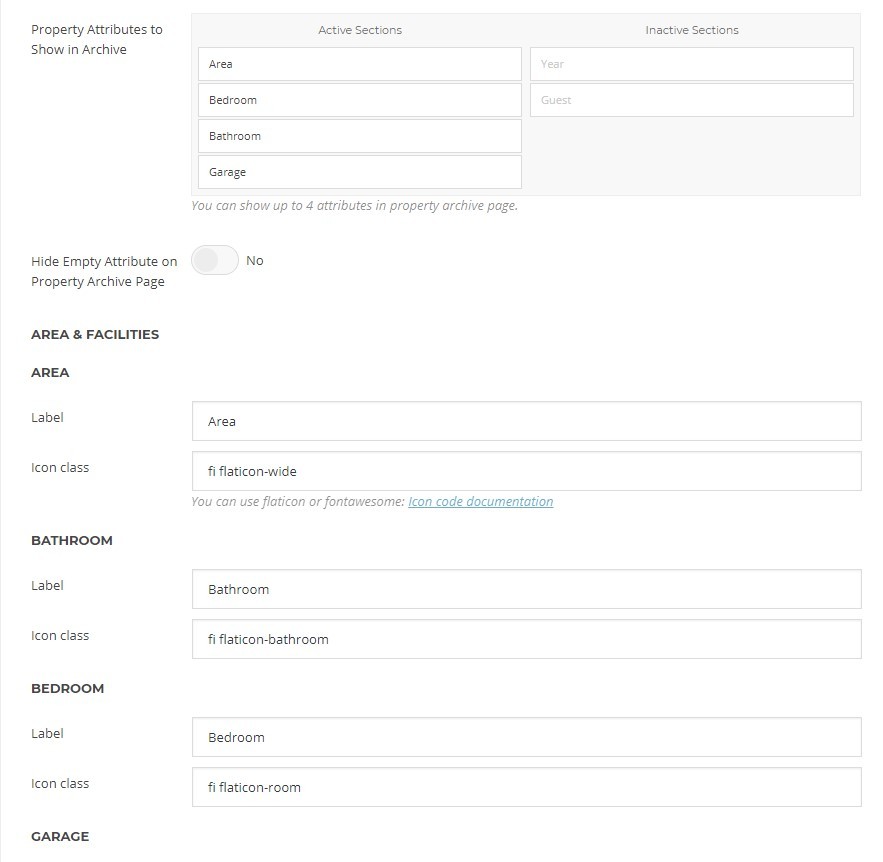
Hide Empty Attribute on Property Single Page
You can choose to show or hide any empty attribute. If you choose yes so the empty attribute or has value = 0, will be hidden.
-
Property Archive Page
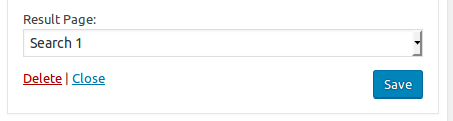
You can choose which page do you want to use as the property archive page. ‘Default’ will use the default archive page for property. Other pages are taken from pages with ‘Search’ or ‘Search 2’ page template.
-
Property Attributes to Show in Archive
You can choose what attributes you want to show at archive page. Just drop attribute to inactive area to remove certain attribute.
-
Area and Facilities
You can customize the label and icon for area and facilities attributes. Fill the label text field with any text you want for labeling your attribute and fill the icon text field with icon class name.
Here is the supported icons class name:
- FontAwesome v.4.7 (https://fontawesome.com/v4.7.0/icons/)
all icons are supported - Flaticons
For flaticons, here is the icons supported:
fi flaticon-home

fi flaticon-map

fi flaticon-guest

fi flaticon-cash

fi flaticon-coffee

fi flaticon-min

fi flaticon-rent

fi flaticon-plus

fi flaticon-cross

fi flaticon-happy

fi flaticon-sale

fi flaticon-support

fi flaticon-play

fi flaticon-project

fi flaticon-more

fi flaticon-wide

fi flaticon-room

fi flaticon-detail

fi flaticon-bathroom

fi flaticon-address

fi flaticon-phone

fi flaticon-garage

fi flaticon-clock
- FontAwesome v.4.7 (https://fontawesome.com/v4.7.0/icons/)
Agent Contact Form
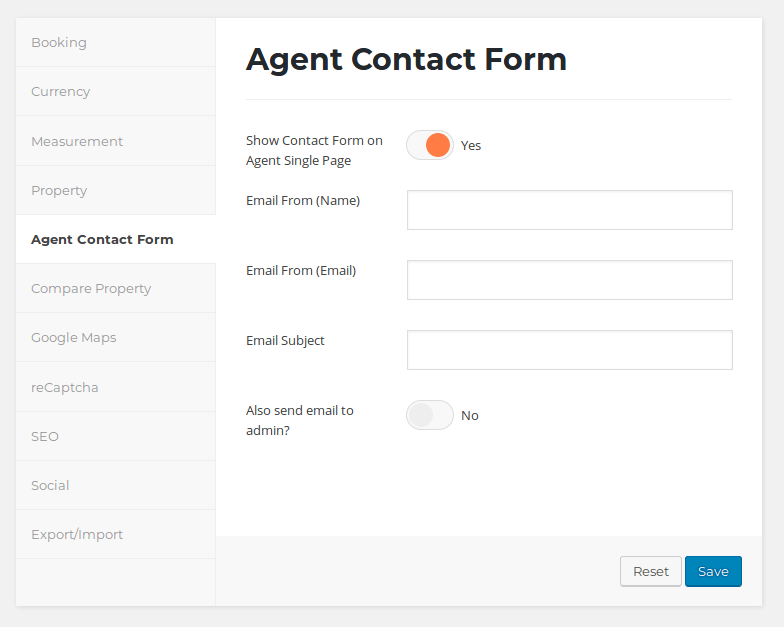
This section is for agent contact form.
- Show Contact Form on Agent Single Page
If enabled, contact form will be shown in agent page. - Email From (Name)
This is the name that will be used in emails sent from agent contact form. - Email From (Email
This is the email address that will be used in emails sent from agent contact form. - Email Subject
This is the subject that will be used in emails sent from agent contact form. - Also send email to admin?
If enabled, a copy of email will be sent to admin email address set in Settings » General.
Compare Property
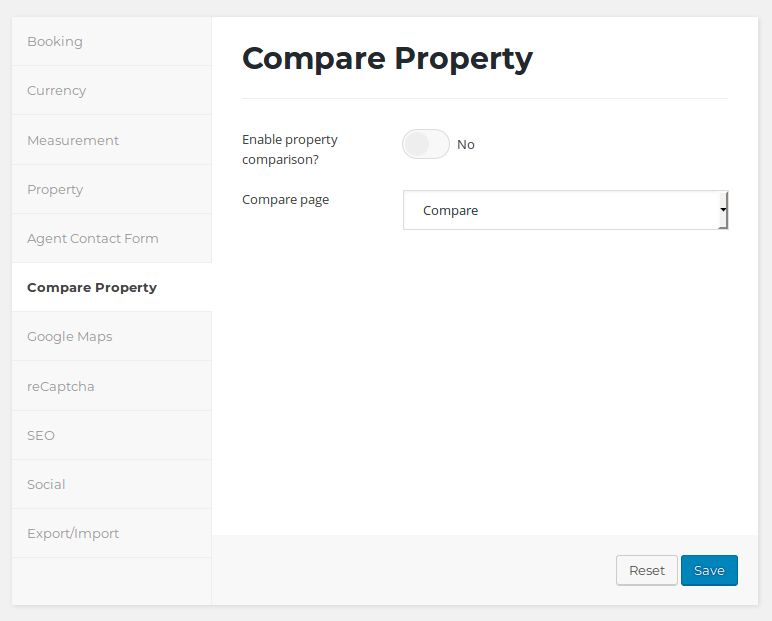
- Enable property comparison?
If enabled, each property in homepage will have a compare button and when you click the button, the property will be added to a compare list in the sidebar. You can add up to 4 properties. Click the compare button in the sidebar to go to the compare page and see the comparison. - Compare page
Choose a page that will be used as the compare page. If you don’t have the page, you need to add an empty page from Pages » Add New, add a title and click Publish.
Google Maps
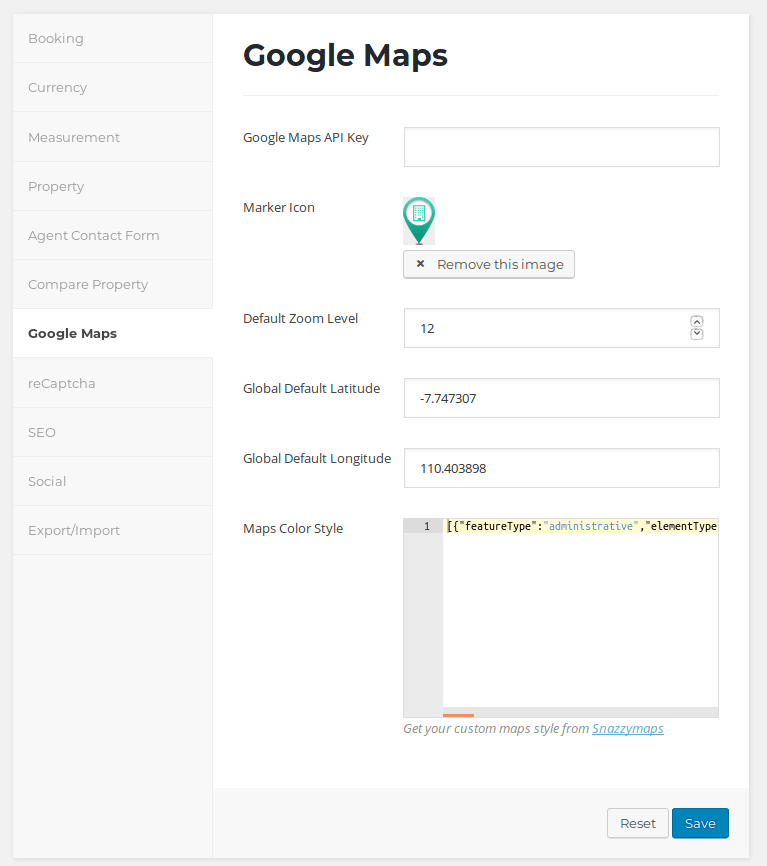
- Google Maps API Key
Enter your google maps API here. You can get the key from https://developers.google.com/maps/ - Marker Icon
If you want to use a custom marker icon, you can upload it here. If empty, default icon from google maps will be used. - Default Zoom Level
To control the zoom levels of maps, you can enter a number here. At low zoom levels, a small set of map tiles covers a wide area; at higher zoom levels, the tiles are of higher resolution and cover a smaller area. - Global Default Latitude
This is the default latitude coordinate - Global Default Longitude
This is the default longitude coordinate - Maps Color Style
If you want to use different style for the maps, you can get a custom style from Snazzymaps. Copy the code from snazzymaps and paste it here to change the style.
reCaptcha
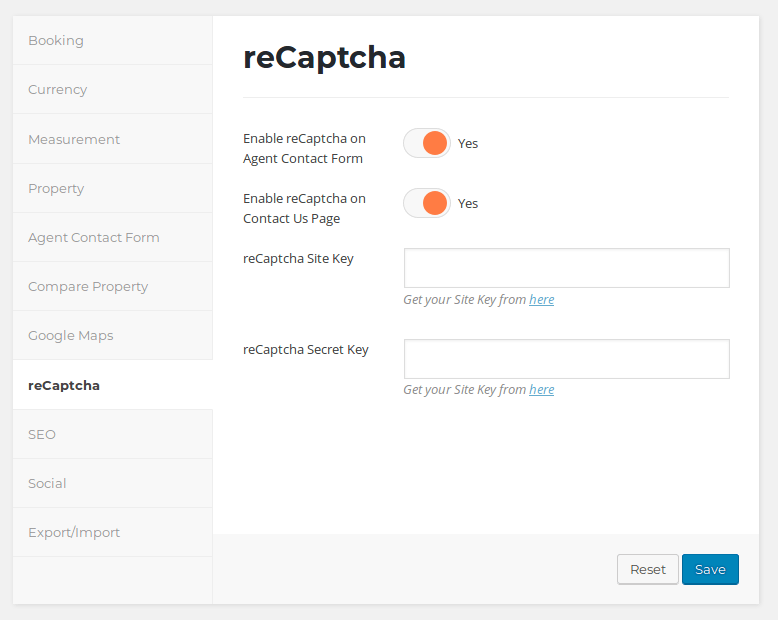
- Enable reCaptcha on Agent Contact Form
If enabled, a captcha will be used in agent contact form. - Enable reCaptcha on Contact Us Page
If enabled, a captcha will be used in contact form in Contact page template. - reCaptcha Site Key
You can get reCaptcha Site Key from https://www.google.com/recaptcha/admin - reCaptcha Secret Key
You can get reCaptcha Secret Key from https://www.google.com/recaptcha/admin
SEO
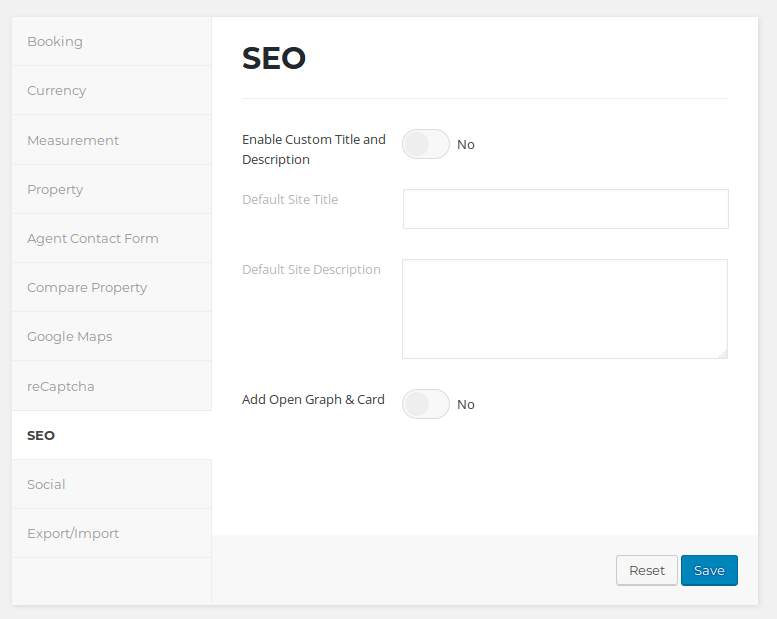
- Enable Custom Title and Description
If enabled, your site will use custom title from Default Site Title field and custom description from Default Site Description field. - Default Site Title
Enter your custom site title here. - Default Site Title
Enter your custom site description here. - Add Open Graph & Card
If enabled, Facebook Open Graph and Twitter Cards will be added in the single posts.
Social
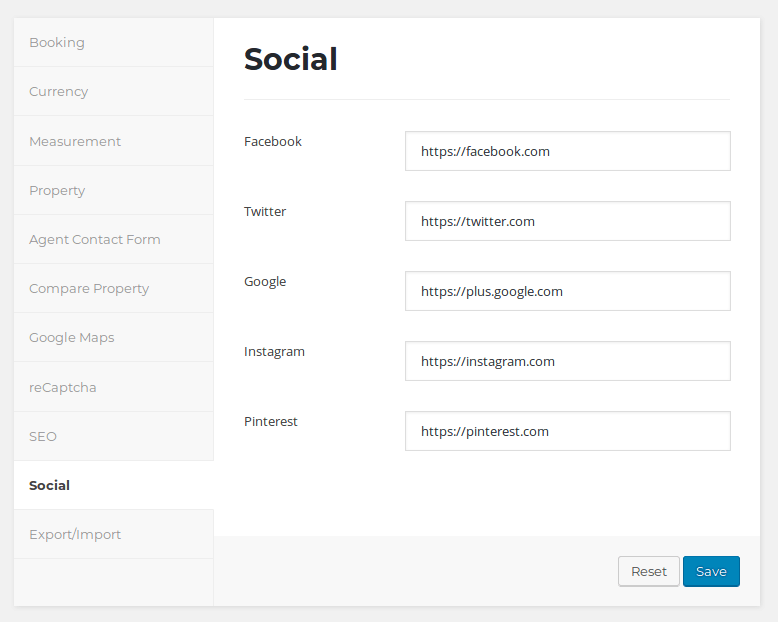
This section is for social media settings. You can enter your social media links (Facebook, Twitter, Google, Instagram, Pinterest) from here. The links will be displayed in header and page builder component (Social Media).
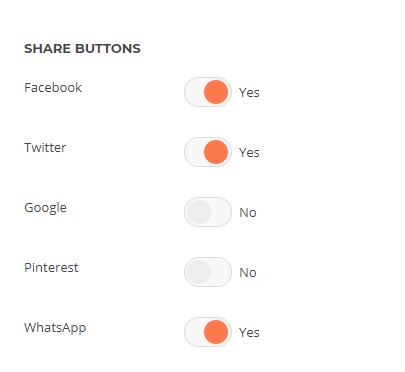
Share buttons.
You can select which social media share button want to display by choose yes option.
Export / Import
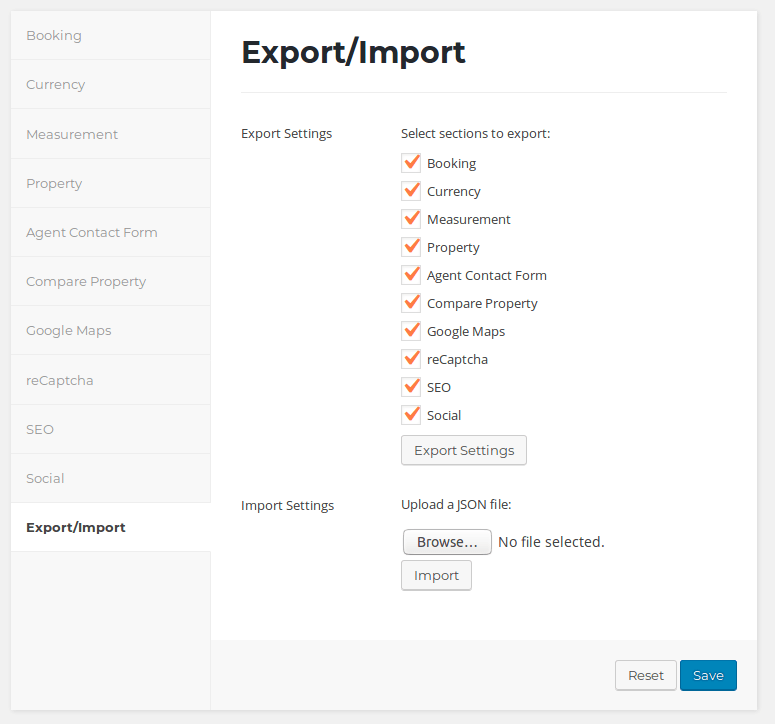
- Export Settings
To export Options data, check the sections you want to export and click Export Settings. The settings will be saved as a json file. - Import Settings
To import the previously saved json file, you can upload the file from here. After you click Import button, the settings will be applied to the Options.
Customizer
Appearance
-
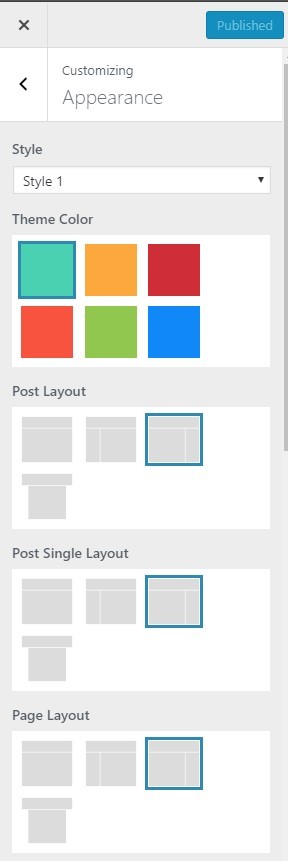
Style
You can choose from 3 available styles.
-
Theme Color
You can choose from 6 predefined colors here.
-
Post Layout
Choose the layout for post: Full width, left sidebar, right sidebar or no sidebar.
-
Post Single Layout
Choose the layout for post: Full width, left sidebar, right sidebar or no sidebar.
-
Page Layout
Choose the layout for post: Full width, left sidebar, right sidebar or no sidebar.
-
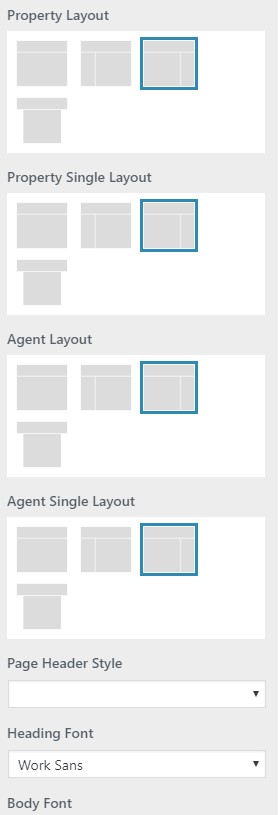
Property Layout
Choose the layout for post: Full width, left sidebar, right sidebar or no sidebar.
-
Property Single Layout
Choose the layout for post: Full width, left sidebar, right sidebar or no sidebar.
-
Agent Layout
Choose the layout for post: Full width, left sidebar, right sidebar or no sidebar.
-
Agent Single Layout
Choose the layout for post: Full width, left sidebar, right sidebar or no sidebar.
-
Page Header Style
Choose the page header style to be used as the background for the page header section: Image, Pattern 1, Pattern 2 or Color. If you choose Image, you will get a new field to upload your custom image. If you choose Color, you will get a new field to choose the color.
-
Heading Font
Choose the font from here and it will be applied to the heading elements (h1 – h6).
-
Body Font
Choose the font from here and it will be applied to other elements.
Site Content
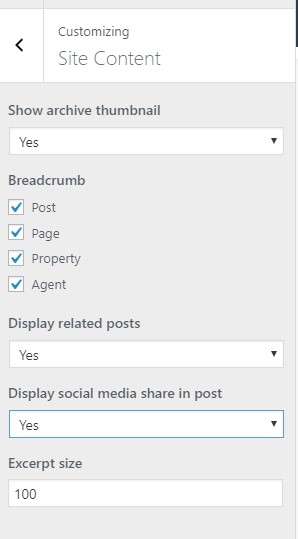
- Show archive thumbnail
Show/hide the thumbnail for the archive page. - Breadcrumb
Choose in which post types you want to show the breadcrumb navigation. - Display related posts
Show/hide related posts section below the single post. Related posts will show the posts from the same categories. - Display social media share in post
Show/hide social share buttons below the single post. - Excerpt size
Set the number of letters for excerpt.
Sidebar
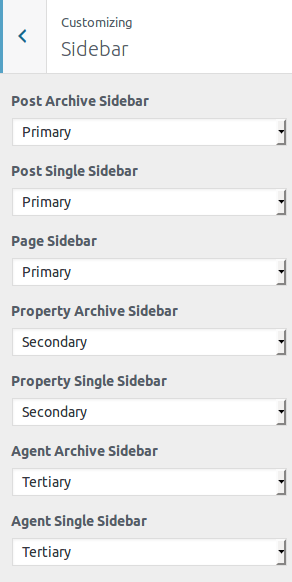
This section is for sidebar settings. You can choose from 3 available sidebars: Primary, Secondary, Tertiary.
- Post Archive Sidebar
Choose a sidebar to be displayed in Archive pages. - Post Single Sidebar
Choose a sidebar to be displayed in Single Post pages. - Page Sidebar
Choose a sidebar to be displayed in Pages. - Property Archive Sidebar
Choose a sidebar to be displayed in Property Archive pages. - Property Single Sidebar
Choose a sidebar to be displayed in Single Property pages. - Agent Archive Sidebar
Choose a sidebar to be displayed in Agent Archive pages. - Agent Single Sidebar
Choose a sidebar to be displayed in Single Agent pages.
Header
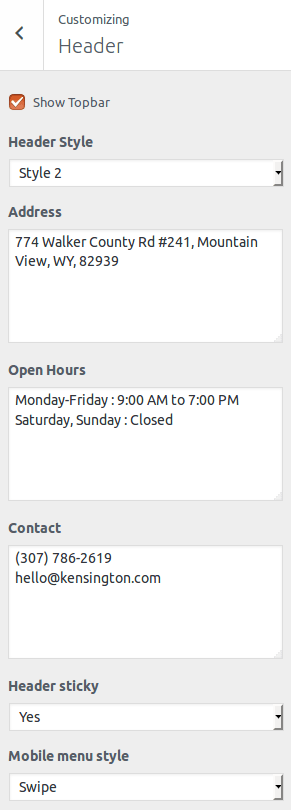
This section is for header area. You can choose to show/hide the topbar, choose the header style (Style 1 – 9), enter your Address, Open Hours and Contact, enable sticky header, and choose mobile menu style (dropdown or swipe).
Footer
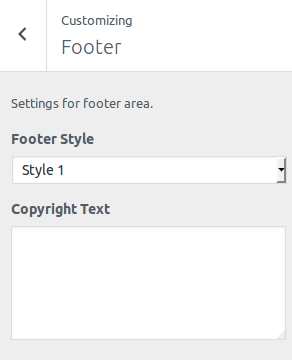
This section is for footer settings. You can choose the footer style (Style 1 – Style 3) and enter the copyright text.
Properties
Agents
Please note that you can’t use Agents feature if you enable the Booking Platform from Kensington Options » Booking.

To manage agents, go to Agents » All Agents. You will see a list of agents.
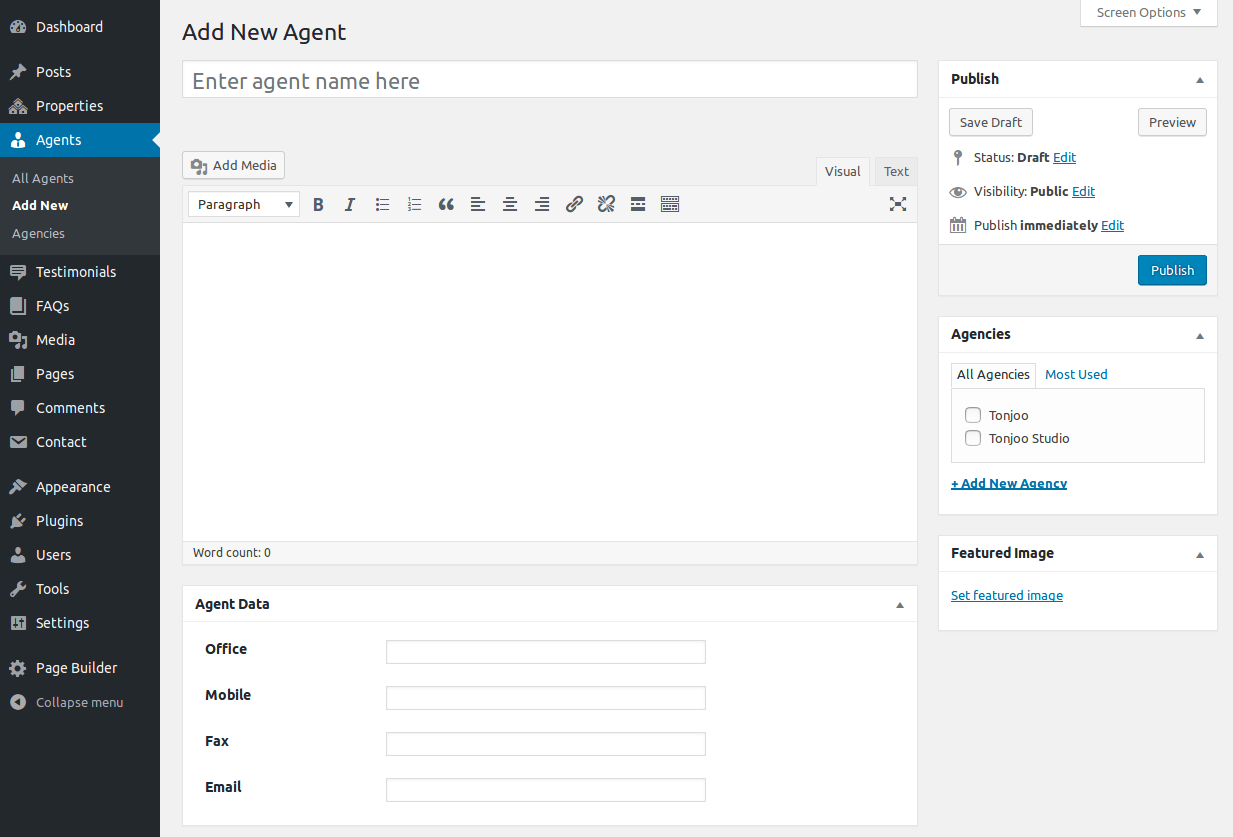
To add an agent, go to Agents » Add New. Enter the name, Description, Agencies, Featured Image (agent photo), and Agent Data (Office, Mobile, Fax, Email). The data will be displayed in the agent page.
Add User as Agent
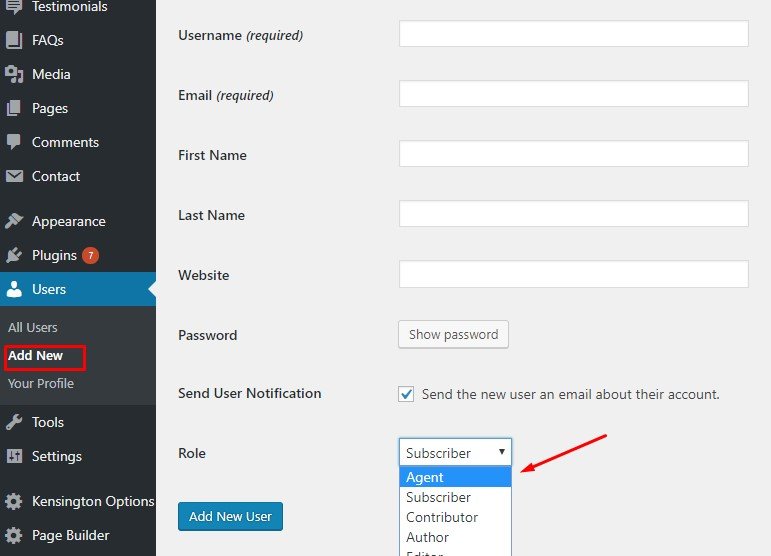
To add a user as agent, go to Users » Add New. Fill the available form, especially the required form and set the role as agent.
The agent user has only access to property and agent post type. An agent user has ability to add new property.
Create New Property
To create a new property, go to Properties » Add New. You can enter your Property Title, Description, Featured Image, and Property Data.
All your property information like price, rooms, address, etc can be set in the Property Data section below the content editor. If you enable booking platform in Kensington Options, you will get an option to choose Bookable/Not Bookable. If the booking platform is not enabled, you will get an option to choose For Rent/For Sale.
-
General
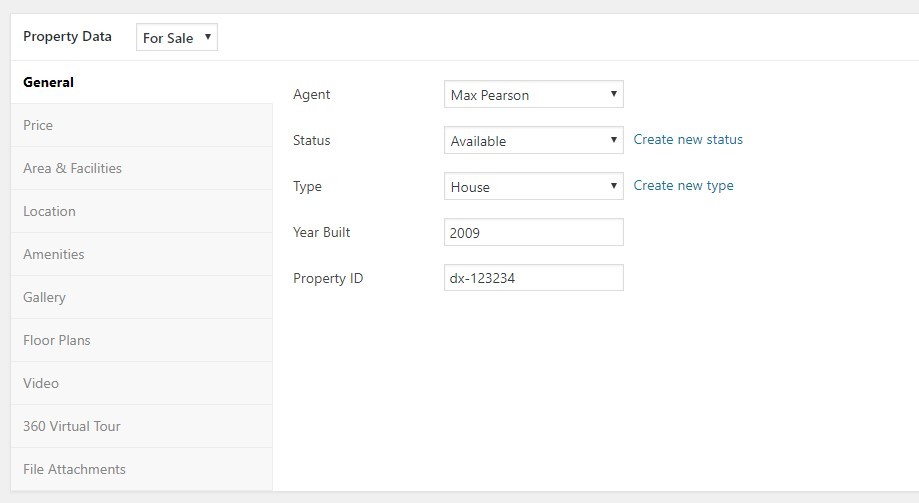
In this section you can select the Agent, select/create new status for example Available or Sold, select/create new type for example Apartment, House, Villa, etc, the year built and property ID.
-
Price
Here you can enter the property price with prefix and postfix, or Book Price per Day and Custom Price (if you enable booking platform).
-
Area & Rooms
Here you can enter the area, measurement unit (square feet or square meter), bedroom number, bathroom number, and garage number. For booking platform, you can also enter number of max guest.
-
Location
You can enter your property location here. Select location from the dropdown or create a new location, enter the address, and choose the location from the map to let your visitors find your property easliy.
-
Amenities
Here you can choose which amenities supported by this property. You can add more amenities from Kensington Options » Property » Amenities.
-
Gallery
Upload your property images here. All images here and the featured image will be displayed as a slideshow in the property single page.
It support multi select. Press “Ctrl” key for enabling select multiple images. -
Floor Plans
You can also upload images here to be used as floor plans, so your visitors can see a complete picture of the property.
-
Video
Here you can enter a video embed code from youtube or other video services.
-
360 Virtual Tour
To make the property more interactive to your visitors, you can include a 360° virtual tour and simulation of your property here. You can get the embed code from Matterport.
-
File Attachments
Here you can upload downloadable documents such as PDF files, doc files, or other documents to provide further details related to the property.
-
Availability
For booking platform, you can add unavailable dates from here. The dates added here can’t be selected in the calendar, so visitors can’t book the property at the specified dates.
Property Search Results
To use property search feature, you need to add a page from Pages » Add New. In Page Attributes » Template dropdown, select “Search” or “Search 2”
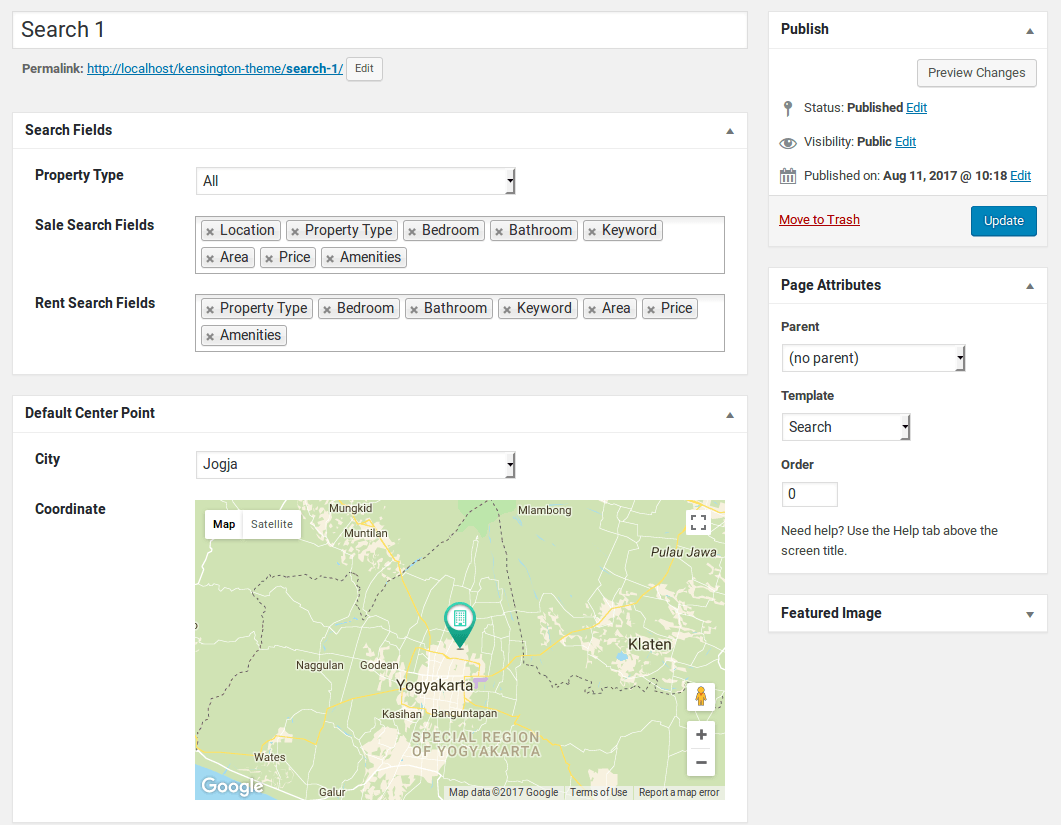
You can set Property Type to search, which fields to display in the search form, and default center point for the map.
After you created the search page, you can select the page as a search result page in:
- Property Search (widget)
- Property Search (page builder component)
- Property Search Map (page builder component)
Compare
To use property compare feature, please follow these steps:
- Add a new page from Pages » Add New
- Go to Kensington Options » Compare Property, set “Enable property comparison” to Yes, and in the Compare page dropdown, select the new page you just created.

After you enabled compare function, you will see a compare button in each property in homepage and search result.

If you click the add button, the property will be added to the sidebar. You can add up to 4 items.
Click Compare button in the sidebar to go to the compare page and see the comparison.
Booking Platform
Create Bookable Property
To use the booking feature, you need to enable it from Kensington Options » Booking » Enable Booking Platform.
Create Bookable Property

To create a bookable property:
- Go to Properties » Add New.
- In the Property Data meta box, choose Bookable.
- Set the book price in Property Data » Price » Book Price per Day.
- Set the maximum number of guests in Property Data » Area & Rooms » Max Guest.
Add Booking widget
To allow your visitors to book your properties, you need to add the Booking widget in your sidebar.
Go to Appearance » Widgets, add the Booking widget into the sidebar for the property single.
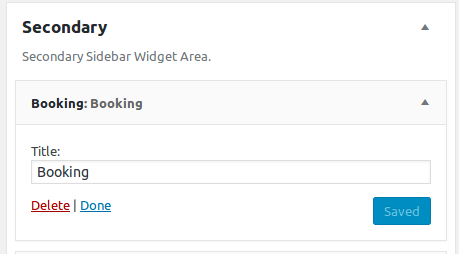
This widget is only displayed in the sidebar in single property page, and only for bookable property.
Custom Price & Availability
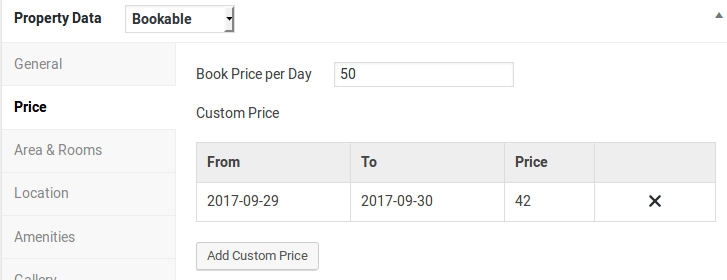
To add a custom price, go to Property Data » Price, click Add Custom Price. Click the date fields (From & To) to show a calendar and set the date, enter the custom price in the Price field, and click Add button.
If you set a custom price, the booking price in the specified dates will use this custom price instead of the normal book price.

You can also add unavailable dates from Property Data » Availability, clik Add Range. Click the date fields (From & To) to set the date, and click Add button.
Unavailable dates can’t be selected in the calendar, so visitors can’t book the property at the specified dates.
Booking Status
There are 5 status used in the booking process:
| Deposit Paid | Booking is created, but the deposit is not paid. | |
| Pending Deposit | Booking is created, customer has paid the deposit. | |
| Pending Payment | Customer has not paid the final payment. | |
| Completed | Customer has paid the final payment. | |
| Cancelled | Customer cancelled the booking. |
Manage Booking
To manage booking data, go to admin and click Booking from the side menu. You will see a list of booking with status, property, customer, and date information.
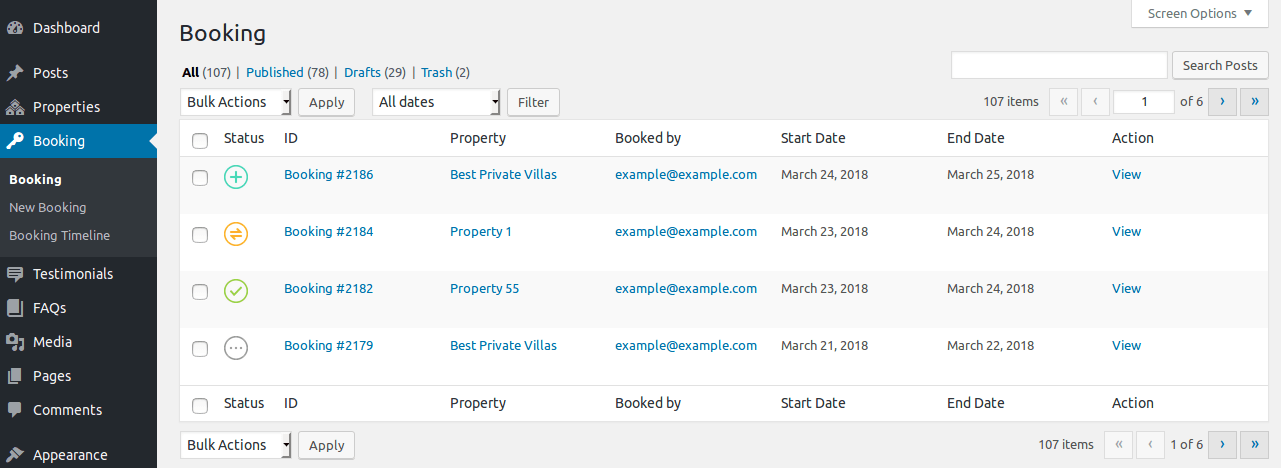
Click on the View link to show the detailed booking data, customer information, payments, invoice and notes.
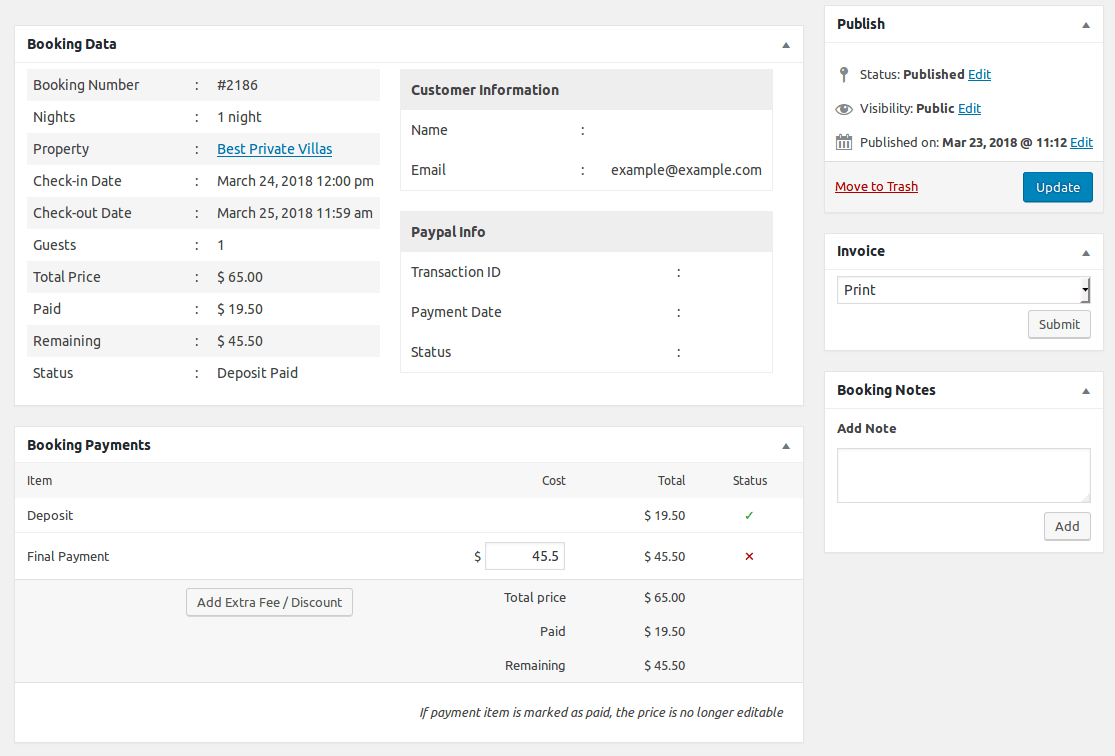
Booking Data
Booking Data shows the detailed information like booking number, number of days/nights, check-in date, check-out date, guests, total price, paid, remaining, and status. The customer information shows the customer data from Paypal.
Booking Payments
The payment items and status will be listed here. If the status is completed, you can only view the data. If the status is pending deposit, deposit paid, or pending payment, you can enter the payment and add extra fee / discount. After you click the Update button, the booking status will also be updated automatically.
Invoice
In this section, you can choose to print or send the invoice via email to the customer.
Create a New Booking
As the website admin, you can also create a booking manually from Booking » New Booking
You will need to complete these 2 steps:
Step 1

- Choose the property by typing the property name in the Select Property field
- Enter the check-in and check-out date
- Enter the guest number
- When you complete all fields, it will check if the property is available to book. If it is available, you can click Next Step button. If it’s not, you will not be able to continue to the next step.
Step 2
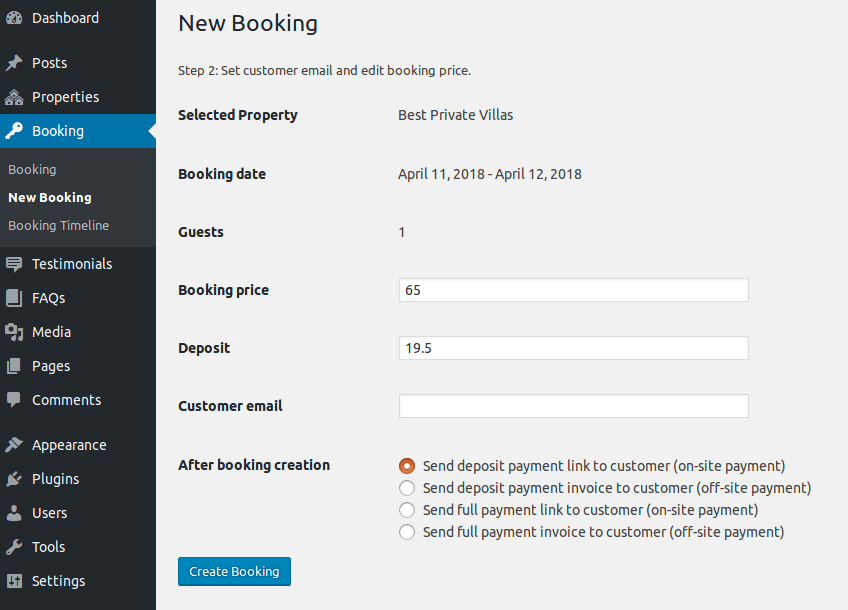
In this step, the booking price and deposit for this property will be calculated automatically based on the property price and the check-in/check-out date.
You can edit the fields if you need to adjust the price and deposit.
Enter the email of your customer, and select the action to do after you submit this form:
- Send deposit payment link to customer
This will send the deposit payment link to the customer email. Your customer need to click the link provided in the email and pay the deposit to finish the booking process. - Send deposit payment invoice to customer
This will send the invoice to the customer email. The booking is created and you will be redirected to the edit booking page, where you need to enter the deposit payment. - Send full payment link to customer
This will send the full payment link to the customer email. Your customer need to click the link provided in the email and pay the full price to finish the booking process. - Send full payment invoice to customer
This will send the invoice to the customer email. The booking is created and you will be redirected to the edit booking page, where you need to enter the final payment.
Booking Timeline
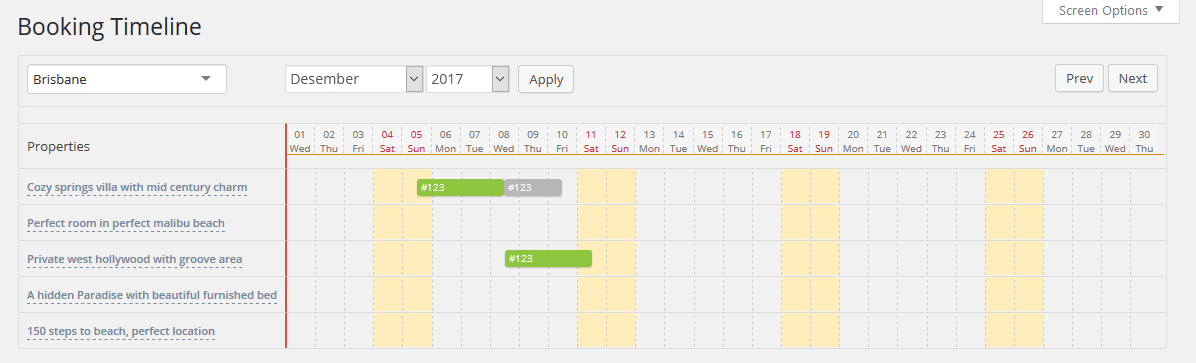
To view the booking timeline, go to Booking » Booking Timeline. In this page, you can view the timeline of booked properties in 1 month.
The booked properties with completed status will be displayed in green color, other status will be displayed in gray color. To view the booking detail, click on the booking number.
Widgets
Widget Areas
This theme has 4 widget areas for footer and 3 for sidebar. For the sidebar, you can only show 1 sidebar at a time (Primary, Secondary or Tertiary). You can choose which sidebar to use from Customizer » Sidebar.
Custom Widgets
As an addition to the built-in WordPress widgets, this theme also has custom widgets: Contact Agent, Contact Form Agent, Contact Form 7, Property List, Property Search, and Booking.
- Contact Agent
This widget allows you to show the agent info (Agent name, photo, email & phone). This widget is only available in the property single page and when the booking platform is not enabled. - Contact Form Agent
This widget allows you to add a contact form for the agent. This widget is only available in the property single page and when the booking platform is not enabled. - Contact Form 7
This widget allows you to show a contact form from the Contact Form 7 plugin. You need to install the plugin first to use this widget. - Property List
This widget allows you to show a list of property. - Property Search
This widget allows you to show a search form for property. You can select which fields to show in the search form and choose the page for the result page. - Booking
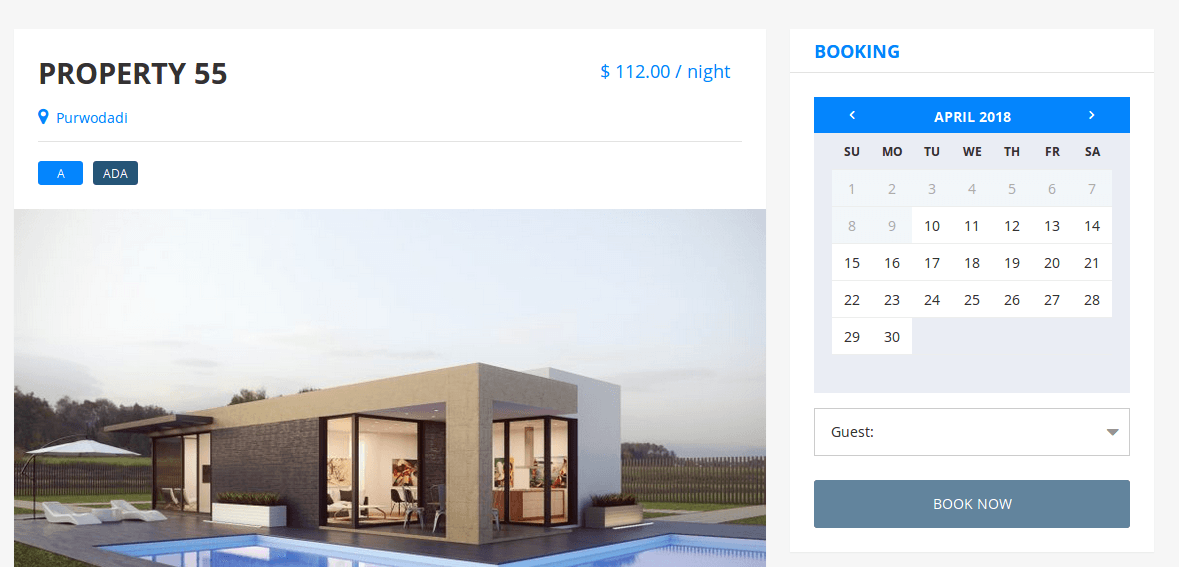
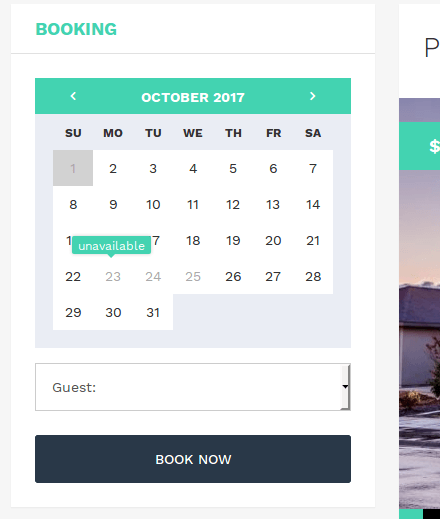
This widget allows you to show a booking form. Visitors will be able to book a property by choosing the start date & end date from the calendar, choose the number of guests and click Book Now. This widget is only available if you enable the booking platform.
Menu
Mega Menu
To enable mega menu, please add “multi-column” class in the CSS Classes field of the parent menu item. The CSS Classes field can be enabled from Screen Options at the top right of the Menus page.

Translation
Translate the Theme
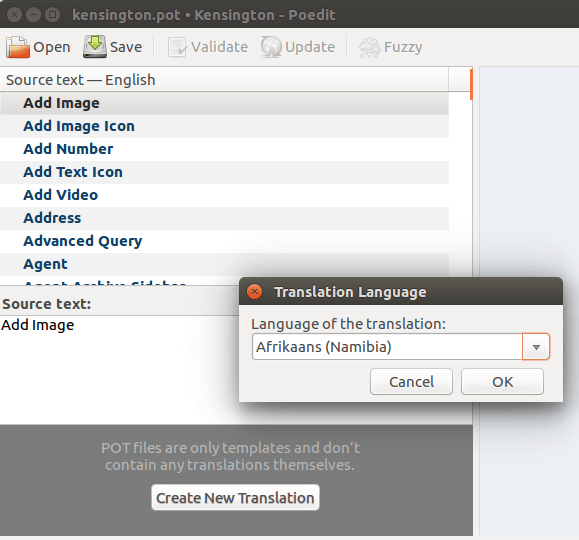
To translate the theme, we recommend you to install Poedit (https://poedit.net).
After you install Poedit, please follow these steps:
- Go to languages folder in kensington theme and locate the kensington.pot file
- Open the .pot file with Poedit
- Click on the “Create New Translation” button and choose the translation language
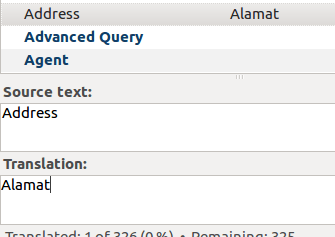
- Select on each text you want to translate from the “Source text — English” field and type the translation into the “Translation” field
- After you finish the translation, click on the Save button and enter the file name. If the file name is not automatically generated, you need to enter the language code in lowercase letters, an underscore, followed by the country code in uppercase letters. For example, the file name for Brazilian Portugese would be pt_BR.po
- When you save the .po file, Poedit will automatically create a .mo file with the same name. Upload these 2 files to the languages folder in your website.
- To change the language of your website, open WordPress admin area and go to Settings » General » Site Language. Choose the language you want to load for your website and click Save Changes